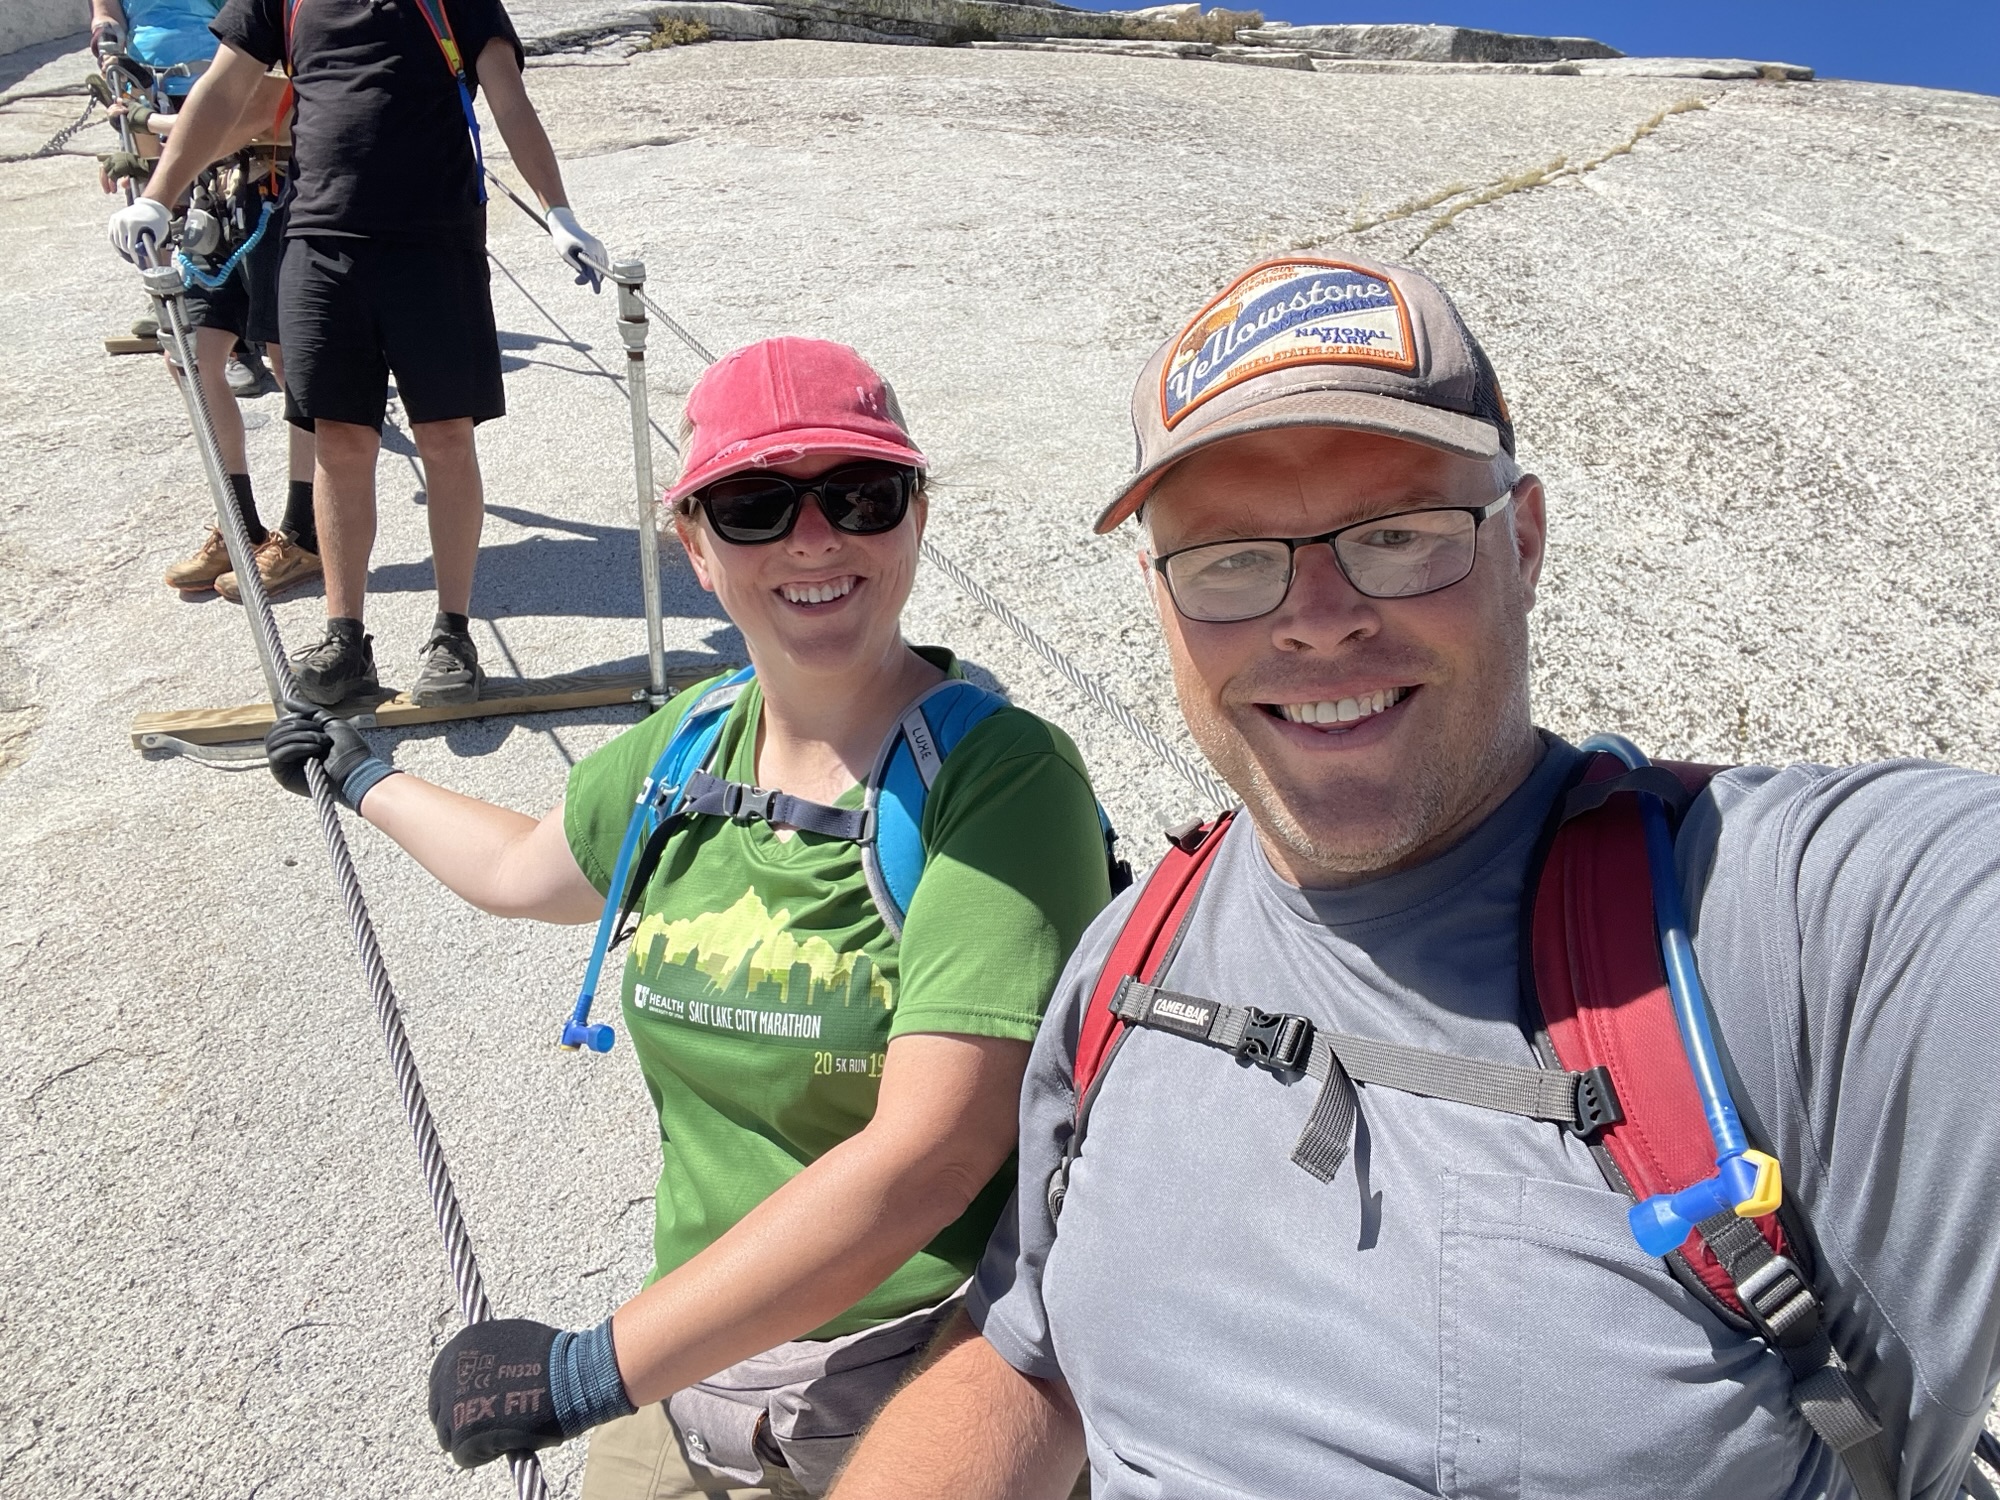
This was it – the MAIN EVENT. The whole reason for the entire trip! Hiking the Half Dome had been a goal for close to 5 years, and today was the day. It’s one of the most famous (and physically demanding) day hikes in the United States. The route climbs nearly a vertical mile, includes a nerve-racking cable ascent, and pushes your endurance from the first step to the last.
Disclosure: This post contains affiliate links. If you click and make a purchase, I may earn a small commission at no extra cost to you. Thanks for supporting my blog!
Trail Details
We hiked up the Mist Trail and we returned on the John Muir Trail. The John Muir Trail added about four miles, but it’s much less steep than the Mist Trail, making it easier on the knees. It was also nice to experience a different side of the mountain. This loop is a common approach for hikers on their way to the Half Dome.
The Mist Trail is very steep, but it passes two of Yosemite’s most iconic waterfalls: Vernal Falls and Nevada Falls.
The published distance for this specific route is I think 16 miles, but both my Fitbit and my AllTrails app clocked it at 20 miles, so that’s what I’m saying we did. Some of that extra mileage likely came from walking to and from the parking area, navigating around crowds, and exploring at the summit.
In addition to all of our physical preparation, I also prepared mentally. I spent time learning exactly what to expect and broke the hike into sections. I even carried a small paper in my fanny pack with notes so that if I ever felt overwhelmed, I could look at it and know exactly where we were and how much farther we had to go.
I did a LOT of research, as I did not want to get myself into a situation I couldn’t get myself out of. Based on my research, I was expecting the following chunks:
| Section | Distance | Difficulty | Elevation Gain |
|---|---|---|---|
| Trailhead → Nevada Falls | ~4.3 mi | Steep | ~2,000 ft |
| Nevada Falls → Little Yosemite Valley | ~1.4 mi | Easy | ~150 ft |
| Little Yosemite Valley → Subdome | ~4.1 mi | Steep | ~2,200 ft |
| Subdome → Cables | ~0.4 mi | Very Steep | ~100 ft |
| Cables → Summit | ~0.4 mi | Extremely Steep | ~280 ft |
*Note: These distances and elevations come from my AllTrails app specifically routed the day we did this hike. Numbers vary depending on the starting point. Refer to the National Park Service website for official guidance.
It was kinda funny preparing for this seeing that there’s really only 1 mile that’s not listed as STEEP. That one mile from Nevada Falls to Little Yosemite is the oasis of the trail. I’d think to myself in looking at this little paper “Why bother breaking this into sections if it’s all just really hard anyway?” But it actually did really help me to help me stay grounded.
At the time of our visit in September 2023, the lower portion of the Mist Trail had scheduled closures from 7:00 AM to 3:00 PM for trail maintenance each day. That meant we needed to be past the closure point before 7:00 AM or risk a long detour. So we woke up at 4:30 AM and arrived around 5:30 AM and parked at the Happy Isles Art and Nature Center, about 1/3 mile away from the trailhead. We were advised that this was the best and closest place to park.
I wanted a plan to pace ourselves, so I set the following goals:
- Start no later than 6:00 AM (we had to get past the Mist Trail closure before 7:00 AM)
- Arrive at Nevada Falls by 9:00 AM
- Arrive at Little Yosemite Valley by 10:00 AM
- Arrives at the cables by 1:00 PM
- Reach the summit by 1:30 PM
- Return to the Subdome by 2:30 PM
- Get back to the car via John Muir Trail by 6:00 PM
In addition to wanting to set myself up for success, we also had dinner reservations I wanted to make sure we were back in time for.
The Hike Up
Vernal and Nevada Falls
The Mist Tail is one of the most popular hikes. There were a lot of people on the trail, despite the early hour. We made it to Vernal Falls at around 6:20 AM, and it was still dark. Just enough sunlight had emerged for us to snap a picture and keep moving.

Reaching Nevada Falls brought a sense of accomplishment and a quick bathroom break. At that point, most people turned around, so the crowds thinned out after this.

Little Yosemite Valley
The next section was a breath of fresh air! It was the only spot the whole trail that wasn’t super steep. It was a nice breather before the real challenge.
Little Yosemite Valley is a common camping spot for people tackling the Half Dome over multiple days. If you don’t want to hike to the summit and back all in one day, many people split the journey into three days.

On Day 1, you hike about 5.5 miles with roughly 2,000 feet of elevation gain to reach the campground. There are no cabins, so you must bring a tent and supplies, and overnight stays require a wilderness permit obtained through a lottery system—similar to the permit required for the cables.
On Day 2, you hike about 4 miles and roughly 2,400 feet of elevation gain to reach the summit, then return to camp for a second night. On Day 3, you descend back to Yosemite Valley.
It’s a great option for hikers who want to experience Half Dome without tackling the entire grueling journey in a single day. For us, we chose the one-day push rather than carry camping gear.

Subdome
The next chunk was steep enough before even getting to the really really hard parts. Shortly before getting to the Subdome, you are met by a park ranger stationed there watching for cable permits. This is the end of the road if you don’t have permits. More on permits in the next post.

Research tells you the Subdome is the hardest part. We spoke to a couple different park rangers in Yosemite Valley at the Wilderness Permit Office in our prior days to get a variety of different advice. Everyone tells you the Subdome is the hardest part. And why wouldn’t it be? It’s an elevation gain of ~100 feet across a very short distance. Super steep.

I was expecting it to be brutal – and it was. But it wasn’t as overwhelming as I expected. I just told myself it wasn’t a race, took my time, and kept putting one foot in front of the other. Going at a steady, unrushed pace made all the difference in the world. I listened peacefully to a book on tape and enjoyed my surroundings.

The Cables Ascent
My experience with the cables was the opposite. I knew the cables were going to be hard – I was definitely not telling myself it would be easy. But it ended up being way harder than I anticipated. More on how I trained for this specific moment in the next post.

Gloves
You definitely need gloves for the cables, or else you’ll end up ripping your hands to shreds. There are tons of discarded gloves at the clearing right before the cables, but don’t count on it, and also… EW. Use your own. These DEX FIT Nylon gloves are the specific ones we used, and they worked great. They were grippy, lightweight, and inexpensive.
Hiking Poles
In addition to the graveyard of discarded gloves at the base of the cables is where people stash their backpacks and hiking poles and anything else they don’t want to carry up. Maybe someday someone will find my hiking pole that I accidentally dropped. To be honest, the trekking poles didn’t help much on this particular journey anyway.
Traffic on the Cables
People are bound to get nervous or even scared, we are all human. General guidance is to keep moving when it’s safe to do so rather than stopping for long periods. When hikers ahead of us froze due to fear, we carefully moved past them. They weren’t thrilled about it, but we also had to consider our own safety and momentum.
Thank goodness for the wooden posts drilled into the granite every 10-15 feet or so. The general strategy is to climb to the next post, pause briefly to rest, and then continue to the next one.
Safety Harnesses
Research on whether or not to use safety harnesses on the cables is divided. I’d say about half the people used them, though we did not. One argument against them is that they can create a false sense of security – people may move more aggressively or take risks because they feel protected. Another argument against them is they can create bottlenecks, which is its own safety issue.
Those who opt to use the safety harnesses say it provides an extra layer of protection in case of a slip, especially during crowded or wet conditions. It can also provide peace of mind.
Ultimately, it comes down to personal comfort and risk tolerance. Do your research and make the decision that feels right for you.
The Half Dome Summit
Chris claims the hike to the top of Machu Picchu was harder than our journey to the Half Dome, but he didn’t lay down and take a 30-minute nap at the top of Machu Picchu like he did for the Half Dome!

We ate lunch and took our time at the top and hit up all viewpoints. To be honest, the view OF the Half Dome is more impressive than the view FROM the Half Dome. But sitting there after such a long climb, feeling the breeze and looking out over Yosemite Valley, brought a deep sense of accomplishment.

The hike itself was breathtaking, and the experience was unforgettable.
The Cables Descent
Coming down the cables was sketchy, because again, you are waiting for people who are lagging. Also, there are not multiple lanes. The people going up are using the same cables as those coming down.

There were people ahead of us not wearing good shoes and they kept slipping, making the descent slower and more stressful.

One lady heading up the cables had a baby on her back and was acting like everyone should get out of her way- people were clapping for her! Me, however, I was furious that she would put a baby in danger like that. I couldn’t help but think of my own tots at home with grandma. I’d NEVER put them in a situation like that.
We didn’t have harnesses. The advice I got from the Wilderness Permit Office was to go down backwards and keep my arms around the cables at all times, and kinda shimmy down.
I actually did slip once coming down. I am so grateful I had my arms locked around the cables. It saved my life! I shudder to think about if I hadn’t caught myself.

The family behind us on the cables were also from Utah and the dad was super cute and kept telling his kids (older teenagers) how lucky they were to be there. I couldn’t but help agree!

Return via the John Muir Trail
Heading back after this experience was exhilarating. Now that I’d accomplished this major goal, I could really open my eyes and drink in the scenery. Yosemite really is one of the most beautiful places I’ve ever been, and the Half Dome experience was breathtaking.


My legs were jello going down the John Muir way, and though I was glad to see another side of the trail and get to explore Nevada Falls from a new angle, there were times where I wished we’d taken the shorter Mist Trail. Chris was annoyed at how slow I did the John Muir section- but man, my legs were shot!


Final Results
I ended up doing much better than I planned. To be fair, my goals were pretty conservative as I wanted to allow myself some grace and room for unexpected delays or fatigue.
- Goal: Arrive at Nevada Falls by 9:00 AM | Actual: Arrived at 7:30 AM
- Goal: Arrive at Little Yosemite by 10:00 AM | Actual: Arrived at 8:30 AM
- Goal: Arrive at the Cables by 1:00 PM | Actual: Arrived at 11:00 AM
- Goal: Get to the TOP by 1:30 PM | Actual: Arrived at 11:30 AM
- Goal: Make it back to the Subdome by 2:30 PM | Actual: Arrived at 1:10 PM
- Goal: Make it back to the car via John Muir by 6:00 PM | Actual: Arrived at 5:00 PM
Even with the fatigue, there was never a time that day that I wished I wasn’t on the trail. Every step was full of awe for the beauty around me – and gratitude for a magnificent Creator.
Hiking Half Dome in one day is grueling, exhilarating, and unforgettable all at once. It will challenge you physically and mentally—but it also shows what steady preparation and determination can accomplish.
One step at a time, even the hardest goals become possible.
Stay Tuned
The next post I’ll give more details about permits, training, and what to take on the trail.
Enjoyed this post? Subscribe below to get new posts by email!
Click here to see all posts related to the 4-National Park Road to the Half Dome!
Leave a Reply