• Hiking Half Dome Tips: Permits, Training, Packing List, and What to Know Before You Go

    Hiking Half Dome was one of the most challenging and rewarding things I’ve ever done. It’s not just a hike — it’s a full-day endurance event that requires planning, preparation, and a little grit.

    If you’re considering hiking Half Dome in Yosemite National Park, preparation makes all the difference between a stressful day and an unforgettable one. Here are my top tips for getting permits, training effectively, packing the right gear, and knowing what to expect on the trail.

    Disclosure: This post contains affiliate links. If you click and make a purchase, I may earn a small commission at no extra cost to you. Thanks for supporting my blog!

    Permits: How to Get One (and My Best Tip)

    You must have a permit to hike beyond the base of the Subdome and climb the cables when they are up. The cables are typically installed between Memorial Day though mid-October. The park limits the number of hikers to 300 people per day (225 day hikers and 75 backpackers) to reduce crowding and improve safety.

    *Note: Backpackers who want to camp in Little Yosemite Valley and climb the cables follow a different process – they should apply for a Half Dome permit along with their wilderness permit through Recreation.gov.

    Preseason Lottery

    Most people get their permits through the preseason lottery, which runs every March.

    Additional permits become available each day during the hiking season through a daily lottery based on cancellations. You can enter the daily lottery two days before your desired hike date.

    Here’s how the preseason lottery works:

    1. Apply through Recreation.gov between March 1-31 – fee is $10 per application
    2. You can request up to 7 different dates or date ranges
    3. Results are announced in mid-April
    4. If selected, you pay an additional $10 per person
    5. Instructions are emailed to you – the printable permit itself is sent about a week before your hike date
    Top Tip for Preseason Lottery Success

    I applied for permits two years in a row and got one on my second try. The first year I request 7 specific dates, not realizing you can choose date ranges. My second attempt at a permit was successful due to this key tip:

    Choose the widest possible date ranges. Don’t stress about getting the permit on a specific date.

    That’s what I did – I knew certain weeks of the summer would not work, and I excluded those from the date ranges I selected, but aside from that, I was an open book in my application. I basically told the lottery system: “Give me any day, and I’ll make it work.”

    Flexibility dramatically improves your chances of getting selected because permits are awarded only if space is available on your requested dates.

    Printing the Permit

    After you win the lottery, you’ll receive an email confirmation. But the actual printable permit typically isn’t available until about a week before your hike.

    That created a real headache for us, since by the time the printable permit was emailed to us, we had already been living out of our trailer with no access to a printer. We actually went out of our way to find one between Kings Canyon and Yosemite. I called around print shops in Fresno, and the UPS Store said they could print it for us – but when we got there, their computer wasn’t working.

    I honestly don’t even remember how we finally got it printed — but we did.

    And then the ranger at the checkpoint didn’t even ask to see it. She simply crossed our names off a list.

    Despite this, I’d still recommend having it printed, or the digital version readily available on your phone – have a snapshot saved to your photos so you don’t have to rely on cell service. Better to be safe than sorry.

    You’ll also need a photo ID that matches the name on the permit.

    What to Pack for the Hike

    This is a long day — typically 16–20 miles with thousands of feet of elevation gain — so packing smart makes a huge difference.

    Here’s what I recommend each person bring in their backpack:

    Absolutely essential
    • CamelBak or hydration pack with 4-5 liters of water
    • 2 x 20 oz bottles of Gatorade, frozen
      • There’s not much better than a slushy Gatorade at the summit of a strenuous hike
    • Trail mix for the journey
    • Lunch for the summit (sandwich, banana, string cheese, fruit snacks, etc)
      • Bring more than you think you’ll need, you’ll have burned a lot of calorites!
    • Good hiking shoes – not brand new, with strong traction and good grip on granite
    • Gloves for the cables
      • Nothing too fancy, these nylon work gloves were inexpensive, simple, and very effective!
      • You will ABSOLUTELY FOR SURE want these for the cables – don’t shred your hands!
    • Hat
    • Sunglasses
    • Sunscreen
    • Compostable toilet tissue
    • Hand sanitizer
    • Printed permit – or access to digital version
    • Photo ID matching the name on the permit
    • Phone or map
    • Ibuprofen/Tylenol
    • Moleskin or blister treatment
    • Kinesiology Tape for problem areas
    • Extra pair of socks (in case you want to swap for a clean pair at some point)
    • Lightweight jacket
    • Water filtration system
    • Headlamp or flashlight (especially if starting early)
      • This portable fan with lights would be perfect – I used this for the Grand Canyon and would have loved having it on the Half Dome. The battery power is crazy good, it acts as a flashlight and a fan to keep you cool.
    • Portable charging bank
      • This VEEKTOMX power bank has been great! We’ve had it for years.
      • I had my FitBit and the AllTrails app both tracking our progress, which takes battery life – not to mention I was also listening to music or audiobooks while hiking
    Optional
    • Trekking poles
      • We brought them but they were more of a nuisance than anything, and I actually dropped one by accident never to be seen again.
      • When we hiked the Grand Canyon, we used these Foxelli Carbon Fiber Trekking Poles, and they were much nicer!
    • Climbing harness with two via ferrata lanyards and two locking carabiners
    • Headphones
    • Downloaded music or audiobooks

    How We Trained for Half Dome

    Mostly just consistent hiking. For several months leading up to our trip, we did the following:

    • 1–2 shorter hikes per week
    • One longer hike each month with increasing distance and difficulty
      • Early July 2023 – we hiked part of Mount Ogden via Beus Canyon Trail in Ogden, UT
        • We did 7.6 miles with 2,884 ft elevation gain
      • Late July 2023 – we hiked Lewis Peak via South Skyline Trail in North Ogden, UT
        • We did 12.3 miles with 3,041 ft elevation gain
      • Late August 2023 – we hiked Ben Lomond Peak via North Skyline Trail in North Ogden, UT
        • We did 18.1 miles with 3,655 ft elevation gain

    Though keep in mind, from my experience training for our Grand Canyon adventure, consistent shorter but steep hikes can be sufficient preparation. I have also found that in staying active by training for and participating in 10Ks and Half Marathons each year keeps me relatively hiking fit. I figure if I can run 3 miles, I can probably hike 10.

    How I Trained for the Cables (My Unconventional Method)

    I have pretty limited upper body strength. After my experience on Angels Landing, I knew pulling myself up cables would be difficult. Since I don’t believe in paying to exercise (though Chris will refute this — he claims paying to run community races absolutely counts), I had to get creative in figuring out how to train for the cables. I ended up using two strategies.

    Pull-ups

    Chris installed a pull-up bar in our basement, and I attempted pull-ups on a consistent basis throughout the summer preceding our trip.

    I never successfully did a single one – and I am not confident I ever will! But I think all the time I spent trying did actually help.

    Car Towing

    How else could I prepare to pull myself up the cables? How could I duplicate the effort involved in pulling myself up a mountain using cables?

    We came up with something a little silly. It was actually Chris’s idea. Maybe once a week for a couple months leading up to our trip, the whole family would drive to the church parking lot. Chris would attach a tow rope to our SUV, and he’d put it in neutral.

    While Chris and the kids sat inside the SUV, I’d pull.

    I literally pulled the family in the SUV back and forth across the parking lot.

    It was a bit embarrassing sometimes – there is a picnic area nearby and sometimes families would be there and would watch me pull. Maybe we should have done it in the dark.

    Though it sounds a bit silly, I really think it helped me tremendously! Getting up those cables was HARD. I may not have made it to the top without this unconventional method of training.

    Chris, on the other hand, did nothing to prepare for this.

    Bathrooms and Water on the Trail

    Bathrooms

    Bathroom options are limited on this trail, and most are basic backcountry toilets that do not flush. Also be prepared for them to not be fully stocked, hence my advice above to bring compostable toilet tissue. Here are the reliable bathroom locations on the Mist Trail route:

    1. Trailhead (Happy Isles)
    2. Near Vernal Falls Footbridge
    3. Top of Nevada Falls
    4. Little Yosemite Valley Campground

    After that, there are no reliable bathrooms. We did stop at the Nevada Falls toilets both going up and down and that was sufficient for us.

    Water

    There are no water refill spigots anywhere on this trail, but there are several spots where you can refill using natural water sources. However, all of these sources require filtration to be safe.

    There are reliable water sources at Vernal Falls, Nevada Falls, and Little Yosemite Valley. Seasonal streams along the trail can dry up later in the summer, so they should never be your primary plan. The safest approach is to simply start with plenty of water and bring a way to filter if needed.

    Final Advice

    Really the hardest part of hiking the Half Dome is getting the permit to begin with. If you’re flexible enough on dates, get lucky with permits, and are willing to put forth the effort to prepare, the hike is strenuous but doable. If I could do it, I think almost any reasonably fit person can too.

    These tips will make your day trip safer, smoother, and far more enjoyable.

    Showing up unprepared doesn’t just create risk for you – it can create danger for everyone on the trail, especially on the cables. So plan ahead, pack smart, start early, and take it one step at a time!

    Enjoyed this post? Subscribe below to get new posts by email!

    Click here to see all posts related to the 4-National Park Road to the Half Dome!

  • How Hard Is the Half Dome Hike? Our 20-Mile One-Day Adventure in Yosemite

    This was it – the MAIN EVENT. The whole reason for the entire trip! Hiking the Half Dome had been a goal for close to 5 years, and today was the day. It’s one of the most famous (and physically demanding) day hikes in the United States. The route climbs nearly a vertical mile, includes a nerve-racking cable ascent, and pushes your endurance from the first step to the last.

    Disclosure: This post contains affiliate links. If you click and make a purchase, I may earn a small commission at no extra cost to you. Thanks for supporting my blog!

    Trail Details

    We hiked up the Mist Trail and we returned on the John Muir Trail. The John Muir Trail added about four miles, but it’s much less steep than the Mist Trail, making it easier on the knees. It was also nice to experience a different side of the mountain. This loop is a common approach for hikers on their way to the Half Dome.

    The Mist Trail is very steep, but it passes two of Yosemite’s most iconic waterfalls: Vernal Falls and Nevada Falls.

    The published distance for this specific route is I think 16 miles, but both my Fitbit and my AllTrails app clocked it at 20 miles, so that’s what I’m saying we did. Some of that extra mileage likely came from walking to and from the parking area, navigating around crowds, and exploring at the summit.

    In addition to all of our physical preparation, I also prepared mentally. I spent time learning exactly what to expect and broke the hike into sections. I even carried a small paper in my fanny pack with notes so that if I ever felt overwhelmed, I could look at it and know exactly where we were and how much farther we had to go.

    I did a LOT of research, as I did not want to get myself into a situation I couldn’t get myself out of. Based on my research, I was expecting the following chunks:

    SectionDistanceDifficultyElevation Gain
    Trailhead → Nevada Falls~4.3 miSteep~2,000 ft
    Nevada Falls → Little Yosemite Valley~1.4 miEasy~150 ft
    Little Yosemite Valley → Subdome~4.1 miSteep~2,200 ft
    Subdome → Cables~0.4 miVery Steep~100 ft
    Cables → Summit~0.4 miExtremely Steep~280 ft

    *Note: These distances and elevations come from my AllTrails app specifically routed the day we did this hike. Numbers vary depending on the starting point. Refer to the National Park Service website for official guidance.

    It was kinda funny preparing for this seeing that there’s really only 1 mile that’s not listed as STEEP. That one mile from Nevada Falls to Little Yosemite is the oasis of the trail. I’d think to myself in looking at this little paper “Why bother breaking this into sections if it’s all just really hard anyway?” But it actually did really help me to help me stay grounded.

    At the time of our visit in September 2023, the lower portion of the Mist Trail had scheduled closures from 7:00 AM to 3:00 PM for trail maintenance each day. That meant we needed to be past the closure point before 7:00 AM or risk a long detour. So we woke up at 4:30 AM and arrived around 5:30 AM and parked at the Happy Isles Art and Nature Center, about 1/3 mile away from the trailhead. We were advised that this was the best and closest place to park.

    I wanted a plan to pace ourselves, so I set the following goals:

    • Start no later than 6:00 AM (we had to get past the Mist Trail closure before 7:00 AM)
    • Arrive at Nevada Falls by 9:00 AM
    • Arrive at Little Yosemite Valley by 10:00 AM
    • Arrives at the cables by 1:00 PM
    • Reach the summit by 1:30 PM
    • Return to the Subdome by 2:30 PM
    • Get back to the car via John Muir Trail by 6:00 PM

    In addition to wanting to set myself up for success, we also had dinner reservations I wanted to make sure we were back in time for.

    The Hike Up

    Vernal and Nevada Falls

    The Mist Tail is one of the most popular hikes. There were a lot of people on the trail, despite the early hour. We made it to Vernal Falls at around 6:20 AM, and it was still dark. Just enough sunlight had emerged for us to snap a picture and keep moving.

    Vernal Falls at 6:20 AM

    Reaching Nevada Falls brought a sense of accomplishment and a quick bathroom break. At that point, most people turned around, so the crowds thinned out after this.

    Nevada Falls at 7:25 AM

    Little Yosemite Valley

    The next section was a breath of fresh air! It was the only spot the whole trail that wasn’t super steep. It was a nice breather before the real challenge.

    Little Yosemite Valley is a common camping spot for people tackling the Half Dome over multiple days. If you don’t want to hike to the summit and back all in one day, many people split the journey into three days.

    Little Yosemite Valley at 8:20 AM

    On Day 1, you hike about 5.5 miles with roughly 2,000 feet of elevation gain to reach the campground. There are no cabins, so you must bring a tent and supplies, and overnight stays require a wilderness permit obtained through a lottery system—similar to the permit required for the cables.

    On Day 2, you hike about 4 miles and roughly 2,400 feet of elevation gain to reach the summit, then return to camp for a second night. On Day 3, you descend back to Yosemite Valley.

    It’s a great option for hikers who want to experience Half Dome without tackling the entire grueling journey in a single day. For us, we chose the one-day push rather than carry camping gear.

    We were surprised to see this pack of horses here. We decided they must be transporting gear and essentials for rangers.

    Subdome

    The next chunk was steep enough before even getting to the really really hard parts. Shortly before getting to the Subdome, you are met by a park ranger stationed there watching for cable permits. This is the end of the road if you don’t have permits. More on permits in the next post.

    2 miles to Half Dome!

    Research tells you the Subdome is the hardest part. We spoke to a couple different park rangers in Yosemite Valley at the Wilderness Permit Office in our prior days to get a variety of different advice. Everyone tells you the Subdome is the hardest part. And why wouldn’t it be? It’s an elevation gain of ~100 feet across a very short distance. Super steep.

    The Subdome

    I was expecting it to be brutal – and it was. But it wasn’t as overwhelming as I expected. I just told myself it wasn’t a race, took my time, and kept putting one foot in front of the other. Going at a steady, unrushed pace made all the difference in the world. I listened peacefully to a book on tape and enjoyed my surroundings.

    Chris snapped a picture of me plodding along the Subdome

    The Cables Ascent

    My experience with the cables was the opposite. I knew the cables were going to be hard – I was definitely not telling myself it would be easy. But it ended up being way harder than I anticipated. More on how I trained for this specific moment in the next post.

    We made it to the Half Dome cables!
    Gloves

    You definitely need gloves for the cables, or else you’ll end up ripping your hands to shreds. There are tons of discarded gloves at the clearing right before the cables, but don’t count on it, and also… EW. Use your own. These DEX FIT Nylon gloves are the specific ones we used, and they worked great. They were grippy, lightweight, and inexpensive.

    Hiking Poles

    In addition to the graveyard of discarded gloves at the base of the cables is where people stash their backpacks and hiking poles and anything else they don’t want to carry up. Maybe someday someone will find my hiking pole that I accidentally dropped. To be honest, the trekking poles didn’t help much on this particular journey anyway.

    Traffic on the Cables

    People are bound to get nervous or even scared, we are all human. General guidance is to keep moving when it’s safe to do so rather than stopping for long periods. When hikers ahead of us froze due to fear, we carefully moved past them. They weren’t thrilled about it, but we also had to consider our own safety and momentum.

    Thank goodness for the wooden posts drilled into the granite every 10-15 feet or so. The general strategy is to climb to the next post, pause briefly to rest, and then continue to the next one.

    Safety Harnesses

    Research on whether or not to use safety harnesses on the cables is divided. I’d say about half the people used them, though we did not. One argument against them is that they can create a false sense of security – people may move more aggressively or take risks because they feel protected. Another argument against them is they can create bottlenecks, which is its own safety issue.

    Those who opt to use the safety harnesses say it provides an extra layer of protection in case of a slip, especially during crowded or wet conditions. It can also provide peace of mind.

    Ultimately, it comes down to personal comfort and risk tolerance. Do your research and make the decision that feels right for you.

    The Half Dome Summit

    Chris claims the hike to the top of Machu Picchu was harder than our journey to the Half Dome, but he didn’t lay down and take a 30-minute nap at the top of Machu Picchu like he did for the Half Dome!

    Half Dome summit

    We ate lunch and took our time at the top and hit up all viewpoints. To be honest, the view OF the Half Dome is more impressive than the view FROM the Half Dome. But sitting there after such a long climb, feeling the breeze and looking out over Yosemite Valley, brought a deep sense of accomplishment.

    View from Half Dome

    The hike itself was breathtaking, and the experience was unforgettable.

    The Cables Descent

    Coming down the cables was sketchy, because again, you are waiting for people who are lagging. Also, there are not multiple lanes. The people going up are using the same cables as those coming down.

    Making the descent down the Half Dome cables

    There were people ahead of us not wearing good shoes and they kept slipping, making the descent slower and more stressful.

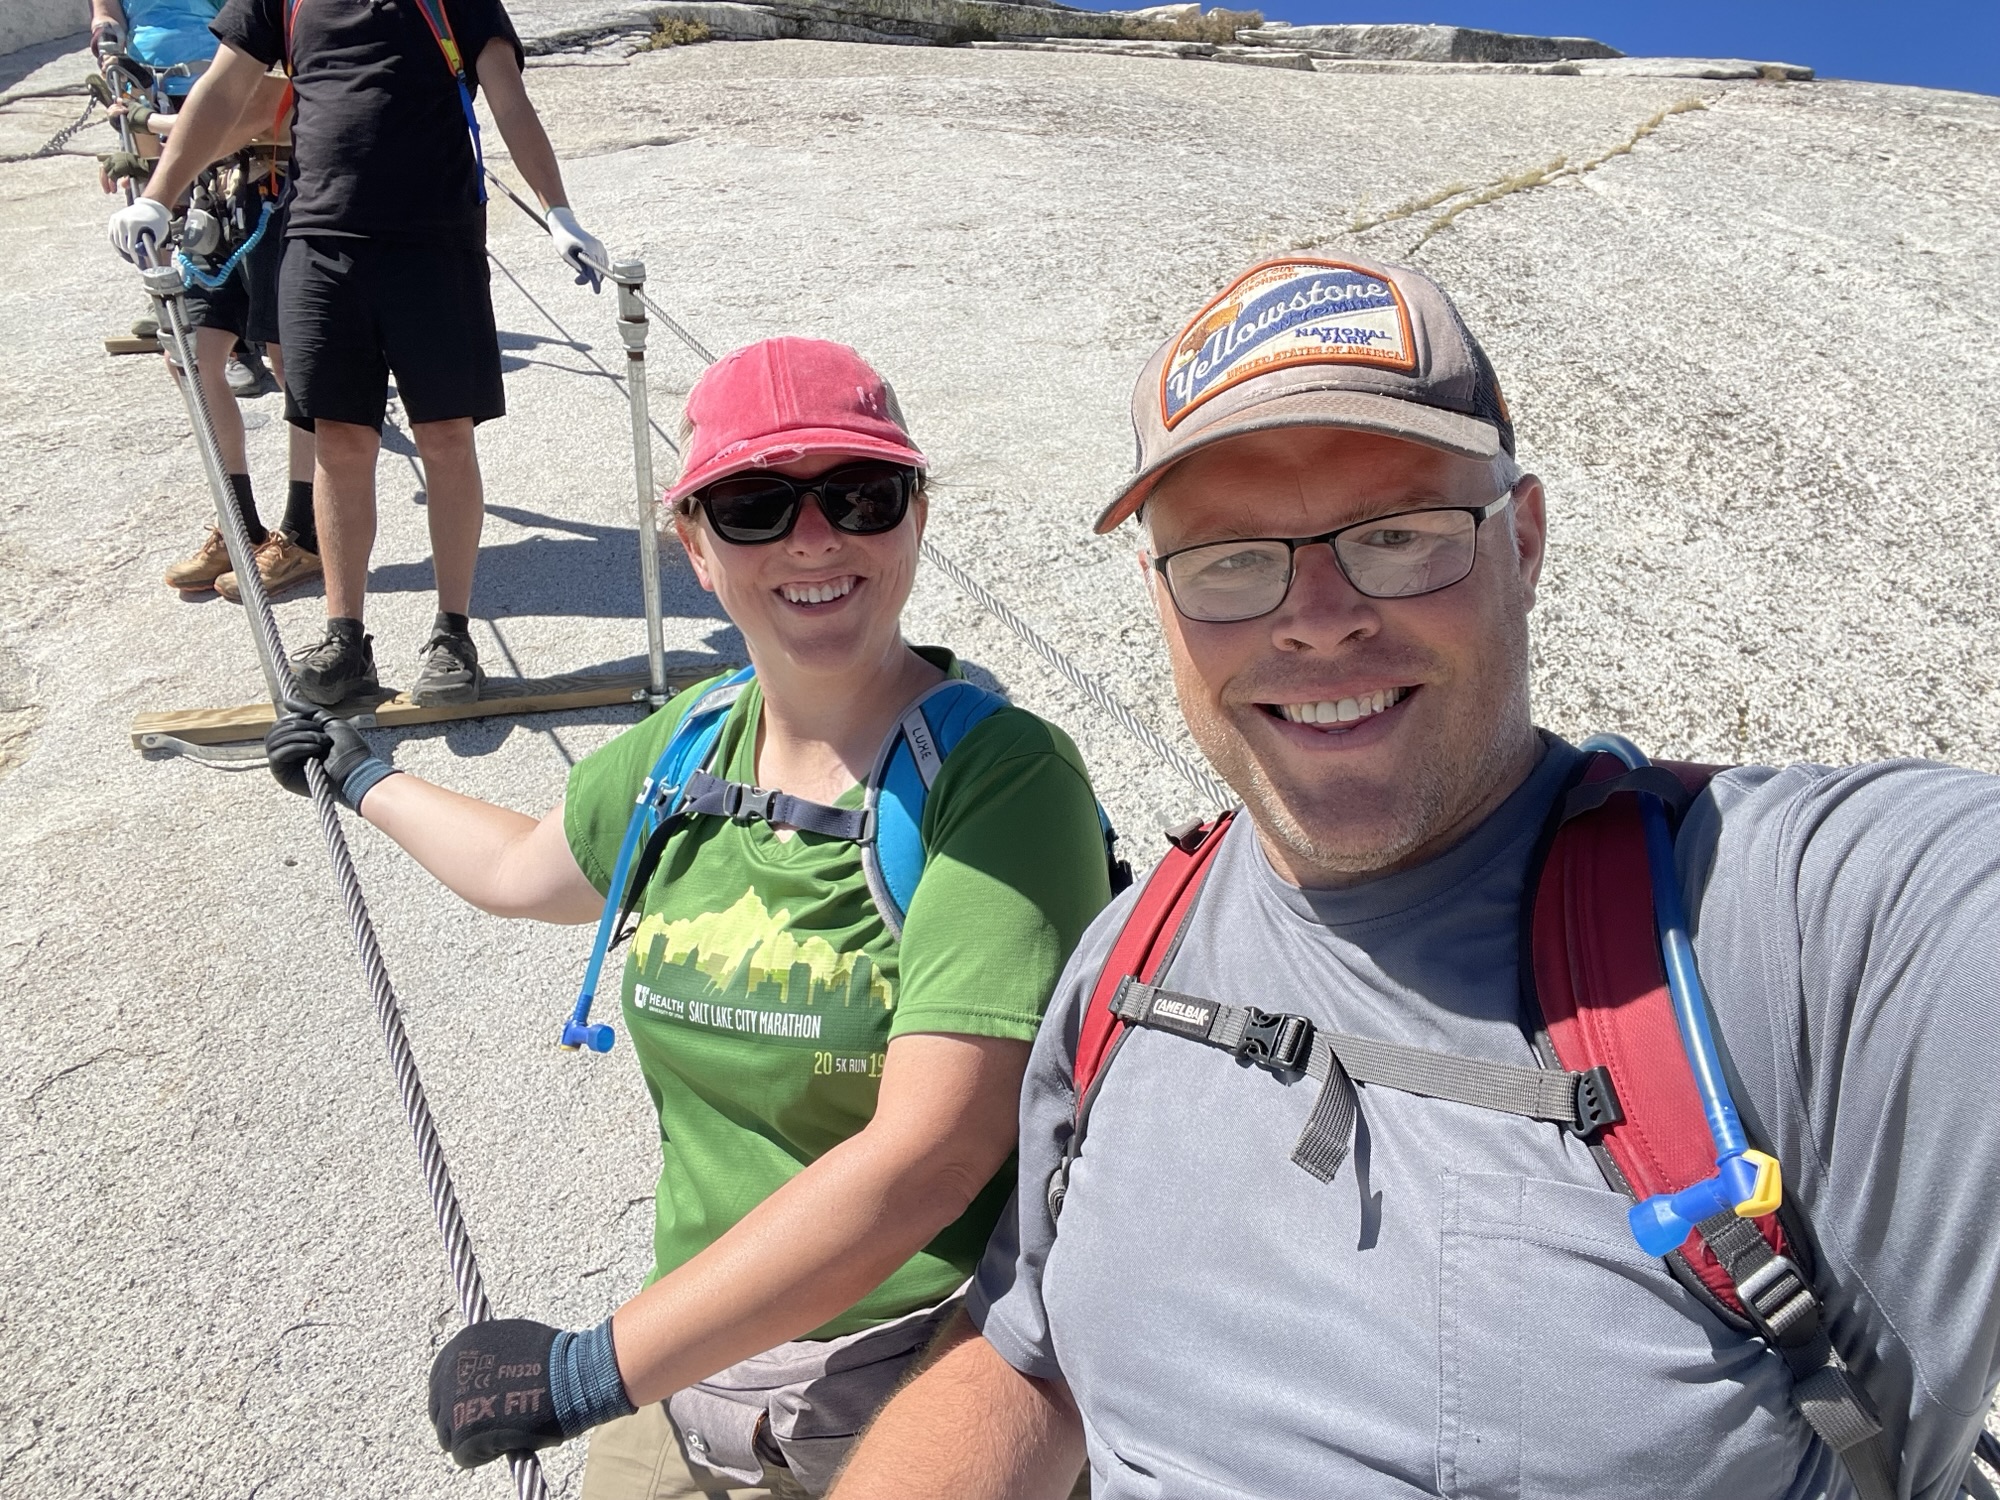
    Me and Chris descending the Half Dome cables

    One lady heading up the cables had a baby on her back and was acting like everyone should get out of her way- people were clapping for her! Me, however, I was furious that she would put a baby in danger like that. I couldn’t help but think of my own tots at home with grandma. I’d NEVER put them in a situation like that.

    We didn’t have harnesses. The advice I got from the Wilderness Permit Office was to go down backwards and keep my arms around the cables at all times, and kinda shimmy down.

    I actually did slip once coming down. I am so grateful I had my arms locked around the cables. It saved my life! I shudder to think about if I hadn’t caught myself.

    Shimmying down the Half Dome cables

    The family behind us on the cables were also from Utah and the dad was super cute and kept telling his kids (older teenagers) how lucky they were to be there. I couldn’t but help agree!

    We made it! Safe return to the base of the Half Dome cables.

    Return via the John Muir Trail

    Heading back after this experience was exhilarating. Now that I’d accomplished this major goal, I could really open my eyes and drink in the scenery. Yosemite really is one of the most beautiful places I’ve ever been, and the Half Dome experience was breathtaking.

    Beautiful scenery heading back to Little Yosemite Valley
    We couldn’t have asked for a better day

    My legs were jello going down the John Muir way, and though I was glad to see another side of the trail and get to explore Nevada Falls from a new angle, there were times where I wished we’d taken the shorter Mist Trail. Chris was annoyed at how slow I did the John Muir section- but man, my legs were shot!

    Nevada Falls
    John Muir Trail with view of Nevada Falls

    Final Results

    I ended up doing much better than I planned. To be fair, my goals were pretty conservative as I wanted to allow myself some grace and room for unexpected delays or fatigue.

    • Goal: Arrive at Nevada Falls by 9:00 AM | Actual: Arrived at 7:30 AM
    • Goal: Arrive at Little Yosemite by 10:00 AM | Actual: Arrived at 8:30 AM
    • Goal: Arrive at the Cables by 1:00 PM | Actual: Arrived at 11:00 AM
    • Goal: Get to the TOP by 1:30 PM | Actual: Arrived at 11:30 AM
    • Goal: Make it back to the Subdome by 2:30 PM | Actual: Arrived at 1:10 PM
    • Goal: Make it back to the car via John Muir by 6:00 PM | Actual: Arrived at 5:00 PM

    Even with the fatigue, there was never a time that day that I wished I wasn’t on the trail. Every step was full of awe for the beauty around me – and gratitude for a magnificent Creator.

    Hiking Half Dome in one day is grueling, exhilarating, and unforgettable all at once. It will challenge you physically and mentally—but it also shows what steady preparation and determination can accomplish.

    One step at a time, even the hardest goals become possible.

    Stay Tuned

    The next post I’ll give more details about permits, training, and what to take on the trail.

    Enjoyed this post? Subscribe below to get new posts by email!

    Click here to see all posts related to the 4-National Park Road to the Half Dome!

  • Shy’s Pizza and Wings | 40 Slices of Pizza: Slice #14

    Chris turned 40 at the end of 2025, and I wanted to do something special without throwing a big party that he wouldn’t appreciate. So I gave him what I knew he’d appreciate the most: 40 slices of pizza!

    Our fourteenth stop was: Shy’s Pizza and Wings
    50 E Guadalupe Rd #107, Gilbert, AZ 85234

    Pizza Deal

    We came while visiting Saguaro National Park. After a few days in Tucson, we made our way to Gilbert to spend some time with family. Normally we have pizza on Fridays, but vacation can throw these things off. This was actually as last meal in Arizona before heading home, and we got to take advantage of the Saturday Special, which was a 14″ pizza, 16 boneless wings, and garlic knots for $35. We also got an extra 14″ pizza on top of that. It was a pretty good deal!

    Wings and Knots

    The Saturday Special came with 16 boneless wings, and we both agreed the traditional wings would probably have been better. We tried the honey bbq and the medium buffalo. They were good enough, just nuthin special.

    Honey BBQ and Medium Buffalo Boneless Wings

    The garlic knots were pretty good, we liked them better than the wings.

    Garlic Knots

    The Pizza

    This is where this place shines. The pizza was thin crust and pretty dang good! Way better than the wings and knots.

    We got one Hawaiian and one plain cheese, and they were both super good.

    The dough and the cheese were especially good, and it had the grease I love in a thin crust pizza. Chris didn’t love the sauce, but overall the pizza was well above average.

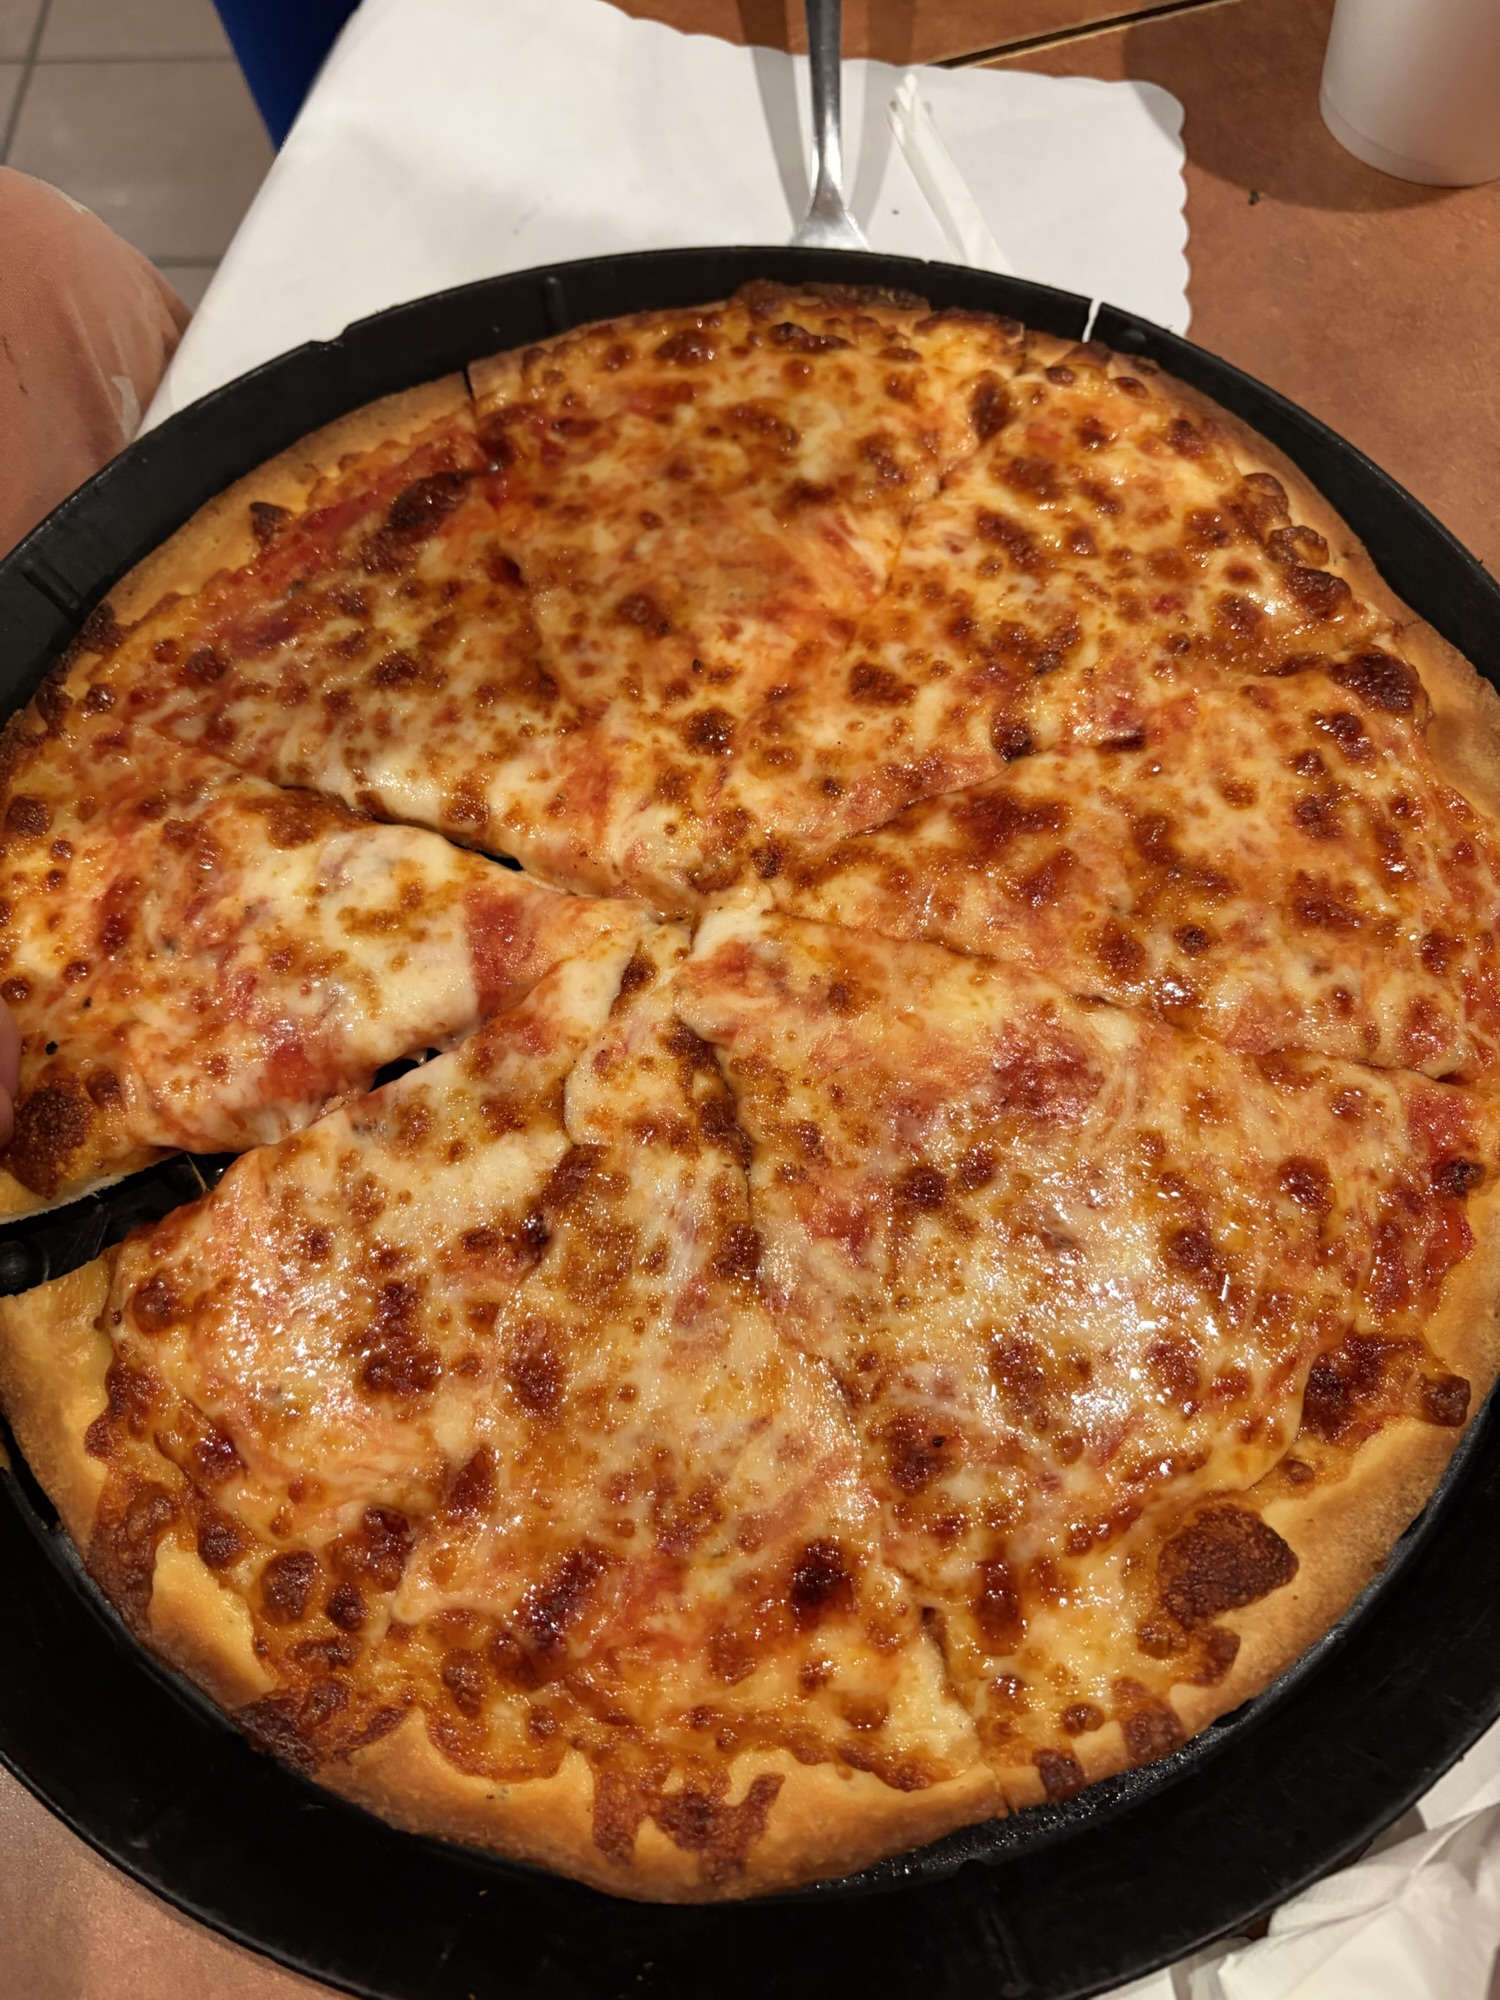
    14″ Cheese Pizza
    14″ Hawaiian Pizza

    The Score

    Chris rated his pizza a 7.9, a solid score! He would have rated in the 8’s had he liked the sauce a bit more.

    Enjoyed this post? Subscribe below to get new posts by email!

    Click here for a complete listing of all 40 pizzas we rated!

  • The Best Low-Effort Things to Do in Yosemite National Park (No Hiking Required)

    Not every adventure in Yosemite requires hours of hiking. On our trip, we discovered plenty of short stops, scenic viewpoints, and easy drives that delivered jaw-dropping views with minimal effort.

    These low-effort activities are perfect if you want to maximize scenery while saving energy for bigger hikes—or if you simply prefer a more relaxed pace. In some ways, many of these quick stops ended up being some of the most memorable moments of our trip.

    Glacier Point

    Glacier Point is one of the easiest ways to experience a breathtaking panoramic view of Yosemite Valley, Half Dome, and Yosemite Falls.

    The stunning view from Glacier Point

    Even a quick stop here feels like a full Yosemite experience.

    Important Reminders

    • Drive access is seasonal: the road typically opens late May through October and closes in winter due to snow
    • Parking can fill up quickly, especially in summer—arrive early if possible
    • You can take short walks to nearby viewpoints or continue on longer hikes to Sentinel Dome or Taft Point from here

    This was one of those places where we stepped out of the car and immediately understood why it’s considered one of the most iconic viewpoints in the entire park.

    Bridalveil Fall

    This short, paved trail leads to the base of one of Yosemite’s most iconic waterfalls. Bridalveil Fall is visible from the road, but walking the trail gives you a closer look—and the chance to feel the mist on your face.

    Expect it to be crowded, and plan for limited parking. This is one of the first major stops visitors encounter when entering Yosemite Valley, so it tends to stay busy throughout the day.

    This should not be confused with Firefall. Firefall is a seasonal phenomenon that occurs at Horsetail Fall in late February, when the setting sun makes the waterfall glow bright orange. It does not happen at Bridalveil Fall—but it’s one of those things that shows up on social media and makes people wonder.

    Pair this stop with a visit to Tunnel View.

    Tunnel View

    Tunnel View is the classic Yosemite postcard view, featuring El Capitan, Bridalveil Fall, and Half Dome all in one sweeping panorama.

    You don’t need to hike for this one—the parking lot is right at the viewpoint.

    Tunnel View

    This is a very popular stop, so plan to arrive early if you want fewer crowds. I was especially interested in this spot because it’s what first sparked my curiosity about the Pohono Trail. Standing there and seeing a trail running along the rim of the valley made me immediately want to know where it went.

    Tenaya Lake

    Tenaya Lake is perfect for a peaceful stop along Tioga Road. The water is crystal clear and framed by high Sierra peaks.

    We were blown away by how beautiful Tenaya Lake was

    You can walk along the shore, skip stones, or just enjoy the view from the parking area.  We stopped here for a quick peek not expecting to be so blown away by how beautiful it was!  We saw people in kayaks and wished we’d set aside more time for this spot.  We definitely will next time.

    Olmsted Point

    Olmsted Point provides a unique perspective of Tenaya Canyon and Half Dome from the east side. This stop is short and scenic—no hiking required—but offers a dramatically different view than the valley floor.

    Olmsted Point

    It’s perfect for photos and especially beautiful at sunset. I would have loved to spend more time climbing around on the surrounding rocks and just soaking in the scenery.

    Yosemite Valley Meadows, Bridges, and Vistas

    I mentioned Cook’s Meadow in my last post, but this whole area is one big low-effort dream spot. There are paved paths everywhere with stunning views of granite cliffs and waterfalls.

    I loved walking along the bridges and taking in the scenery from different angles. I specifically enjoyed the Superintendent Bridge and Sentinel Bridge, which offer fantastic views of the surrounding cliffs and river.

    Chris at the Superintendent Bridge

    The Swinging Bridge (which doesn’t swing!) was much too crowded, and it was difficult to find parking there.

    We spent a lot of time here on our “low-effort” day right before hiking Half Dome. We considered renting bikes to explore the area but ultimately decided to keep things simple. Maybe next time.

    Mirror Lake

    When talking about Yosemite, you have to mention Mirror Lake.

    Unfortunately, it was mostly dried up when we visited in September 2023, which meant we didn’t get to experience the famous Half Dome reflections that the spot is known for.

    That’s completely normal for late summer and fall. Mirror Lake is seasonal and depends on snowmelt, so by September it often looks more like a meadow than a lake. In fact, they were even referring to it as Mirror Meadow rather than Mirror Lake while we were there.

    Though we only stopped by briefly, you can turn this into a longer walk by hiking around the lake.

    If seeing the reflection is important to you, plan to visit in spring or early summer when water levels are highest.

    El Capitan

    Obviously, climbing El Capitan is anything but a low-effort activity.

    I do love rock climbing, but I’m not very good at it. That, combined with the fact that Chris has a fake shoulder, means we don’t do much climbing these days.

    However, it’s surprisingly fun to just sit and watch other people climb.

    El Capitan

    Even just driving by, the massive granite monolith is impressive. Bring binoculars if you want to spot climbers, and expect beautifully warm tones on the granite at sunset.

    Driving Through Tioga Road

    Driving along Tioga Road is one of the most scenic experiences in the park. It passes alpine lakes, meadows, and viewpoints like Tenaya Lake, Olmsted Point, and the entrance to May Lake.

    We spent an entire day exploring Tioga Road, with our favorite stops being Tenaya Lake and May Lake.

    Keep in mind that the road is not always open—it typically closes sometime in November and reopens in late May or early summer, depending on snow conditions.

    Make sure to fuel up before heading east, as services are limited along the road.

    Driving the full length of Tioga Road without stopping typically takes about 1.5 hours—but you’ll almost certainly want to stop along the way.

    Lembert Dome

    Lembert Dome is technically a hike rather than a low-effort activity. It offers a short but moderately challenging climb that looked to us like a “mini” Half Dome.

    View of Lembert Dome from Tuolumne Meadows

    Since we were already planning to hike the real Half Dome, we decided to skip this one.

    The hike is about 3 miles round trip with roughly 700 feet of elevation gain. While the granite can feel steep, it does not require technical climbing skills or special equipment.

    At minimum, it’s an interesting landmark to drive by, and it sits near the Tuolumne Meadows area.

    The Tuolumne Visitor Center was closed when we visited in September 2023, so instead they had a couple of park rangers stationed outside to answer questions. This was due to a major renovation project that lasted several years.

    I will say that this area of the park was probably my least favorite of all the spots we explored—but that’s mostly because everything else in Yosemite set the bar so incredibly high.

    Final Thoughts

    Yosemite offers countless ways to experience its grandeur without committing to strenuous hikes. From dramatic overlooks like Tunnel View to peaceful alpine lakes like Tenaya Lake, these low-effort stops allowed us to see an incredible variety of landscapes in a short amount of time.

    Even if you only have a few hours, or just need a recovery day, these easy stops capture the heart of Yosemite.

    Up Next

    In the next post, I’ll dive into the whole reason for this trip—our grueling but incredibly rewarding hike to Half Dome.

    Enjoyed this post? Subscribe below to get new posts by email!

    Click here to see all posts related to the 4-National Park Road to the Half Dome!

  • Little Caesar’s| 40 Slices of Pizza: Slice #13

    Chris turned 40 at the end of 2025, and I wanted to do something special without throwing a big party that he wouldn’t appreciate. So I gave him what I knew he’d appreciate the most: 40 slices of pizza!

    Our thirteenth stop was: Little Caesar’s
    2572 E South Weber Dr #1, South Weber, UT 84405

    Weeknight Pizza

    I don’t think I’ll surprise anyone by saying that Little Caesars is not our favorite pizza. In fact, Chris has some very strict rules surrounding pizza night, and he does not consider Little Caesar’s to be worthy of a Friday night. So if one of us grabs a Little C’s as a cheap and easy dinner on our way home on a Tuesday, he still expects weekend quality pizza on Friday.

    That being said, Little Caesar’s pizza is pretty good for what it is! It’s a week night pizza when you need a cheap and easy meal to feed the family.

    And to be honest, I’d say it has gotten better over the years. It used to be a survival meal back in college days, but ranch dressing was required to make it palatable.

    These days, ranch dressing is no longer required. I don’t know what Little Caesars has done to change, but it has definitely changed for the better.

    The Pizza

    We almost always get their pizza puffs. They’ve only been around for a few years, but they are basically little pizza cupcakes. Cheesy and greasy and almost always consistently delicious. There are times when you can tell they were not made with love, or were maybe sitting for a minute, but they’re delicious more often than not.

    Little Caesar’s Four Cheese pizza puffs

    As for the pizza itself, we almost always get stuffed crust cheese. As Elaine says on Seinfeld, “It’ll be years before they find another place to hide cheese on a pizza.”

    Little Caesars Stuffed Crust cheese pizza

    The Score

    Chris rated his pizza a 6.1.

    Not bad for week night pizza!

    Enjoyed this post? Subscribe below to get new posts by email!

    Click here for a complete listing of all 40 pizzas we rated!

  • Hiking Options in Yosemite National Park (And Which Ones Are Worth Your Time)

    Hiking is a big part of our visits to National Parks.  It’s really hard for me to know about a trail and not hike it, especially if it seems doable and like I won’t get another chance anytime soon.  We pace ourselves, we make sure we aren’t overtaxing ourselves with multiple strenuous or long hikes each day, but we’ve been known to rack up 10+ miles in a day just exploring shorter trails. Call it a 1-mile loop and you can bet we’re taking it.

    I feel like we had pretty good coverage in hiking the majority of Yosemite, and that’s before we ever even hiked the Half Dome!

    Below are the major hikes we completed during our visit, along with one trail we didn’t do, but would love to on a future trip.

    Disclosure: This post contains affiliate links. If you click and make a purchase, I may earn a small commission at no extra cost to you. Thanks for supporting my blog!

    Wawona Swinging Bridge

    Let me start by saying that there are two bridges in Yosemite National Park that claim to “swing,” but this is the only one that actually does.  There’s a bridge in Yosemite Valley called the “Swinging Bridge,” but calling it that is a bald-faced lie!

    So if you want to walk along a truly “swinging” bridge, this is the one.

    Wawona Swinging Bridge

    I actually knew this going into our trip, and I wanted to swing on a bridge, dang it!  So this was actually the first thing we did on our first full day in Yosemite, the same day we visited the Mariposa Grove.

    It’s not much of a hike, but I also wouldn’t consider it a low-effort activity due to the longer drive to get there, and the mini adventure it can be actually finding it.  This is another one of those spots that you should not rely on Google Maps to find.  Rather than following Google Maps directions, just take the Forest Road all the way to the end to get to the trailhead.

    The trail is probably less than a mile roundtrip with minimal elevation gain.  Plan to spend 20-30 minutes overall.  It was not crowded at all, there was only one other family enjoying the bridge.  It’s fun to walk along and take pictures, but the destination itself is nothing spectacular.  Yosemite has much more impressive things to offer.

    That being said, it’s a fun stop if you are already on your way to the Mariposa Grove.

    Taft Point

    This hike is pretty gosh darn impressive.

    The trail is relatively easy, and what a payoff!  The trail is about 2.2 miles round trip with an elevation gain of about 250 feet.  Plan to spend a couple hours hiking and enjoying the destination.  To get there, drive along Glacier Point Road and park at the Taft Point/Sentinel Dome Trailhead.

    Taft Point offers dramatic cliff-edge views of Yosemite Valley—without the crowds you’ll often find at Glacier Point.

    Standing in front of one of the few guard rails at Taft Point

    The hike itself is straightforward, but the final viewpoint sits right along the edge of a massive drop-off.  The hike is also known as the Taft Point & Fissures trail.  The fissures are deep cracks in the rock, and some of them you could probably fall in if you aren’t careful.

    Also, there are no guardrails at most edges. Keep that in mind if that’s the kind of thing that might freak you out.  I mean, I don’t consider myself to be especially afraid of heights, but it definitely kinda freaked me out.

    Look for Chris in the distance overlooking Yosemite Valley from Taft Point

    Definitely give it a try, it’s a hike that is adventurous without being exhausting. You’ll see I completed the hike in my Croc Flops– this hike is Croc Flop approved.

    May Lake

    We hiked to May Lake on the day we were exploring Tioga Road.  It was pretty quiet, and it’s at a much higher elevation (about 9200 feet).  It’s about 2.4 miles round trip with an elevation gain of about 500 feet.  It’ll take a couple hours from start to finish.  Turn onto May Lake Road off of Tioga Road to get there.

    May Lake was one of the quieter hikes we did, though there was what appeared to be a Boy Scout group at the destination taking advantage of what used to be a Sierra Club hot spot.  There were the remains of what was once a bustling campsite. 

    May Lake was once part of the historic High Sierra Camp system operated by the Sierra Club, an environmental organization founded by John Muir. These camps allowed visitors to explore Yosemite’s backcountry long before modern backpacking became common. The cabins at May Lake were build in the early 1900s and used as guided wilderness lodging.

    The campground is next to a beautiful alpine lake surrounded by granite peaks.  It was a really beautiful spot and we were somewhat jealous of the group that was planning to spend the night.

    May Lake

    As we started our way back, we crossed paths with a Park Ranger who had been doing some surveillance at May Lake and was on her way back.  We chatted with her the majority of the way down and enjoyed learning about the day in the life of a park ranger.

    McGurk Meadow Trail

    This is another hike accessible by driving the Glacier Point Road.  Park at the McGurk Meadow trailhead.  It’s an easy hike, about 1.8 miles roundtrip with an elevation gain of about 150 feet.

    The draw for this hike was the promise of an old cabin.  The McGurk Cabin was built in the late 1800s by James McGurk, an early settler who used the area for seasonal grazing and homesteading. Today, the cabin offers a glimpse into Yosemite’s pre-National Park history. And let me say, with the way the cabin has sunk, you either have to be very short or crouch to get inside. Chris was definitely too tall, but I had some fun in there.

    Inside McGurk Cabin

    In addition to the opportunity to explore this old cabin, you also get to enjoy forest scenery and wide-open meadows.  It’s very peaceful, I don’t think we ever ran into anyone while exploring the area.

    McGurk Meadows

    Yosemite Valley / Cook’s Meadow

    We saved this area for almost last.  Our last full day in Yosemite was spent hiking the Half Dome, so the day before that we intentionally had a low-effort day.  To be honest, I should probably count this as more of a low-effort activity than a hike, but it does involve walking at least 1 mile if you do the loop trail.  That loop trail can easily be extended into more, but the whole area has minimal elevation gain.  Plan to spend maybe an hour exploring the loop trails in Yosemite Valley.

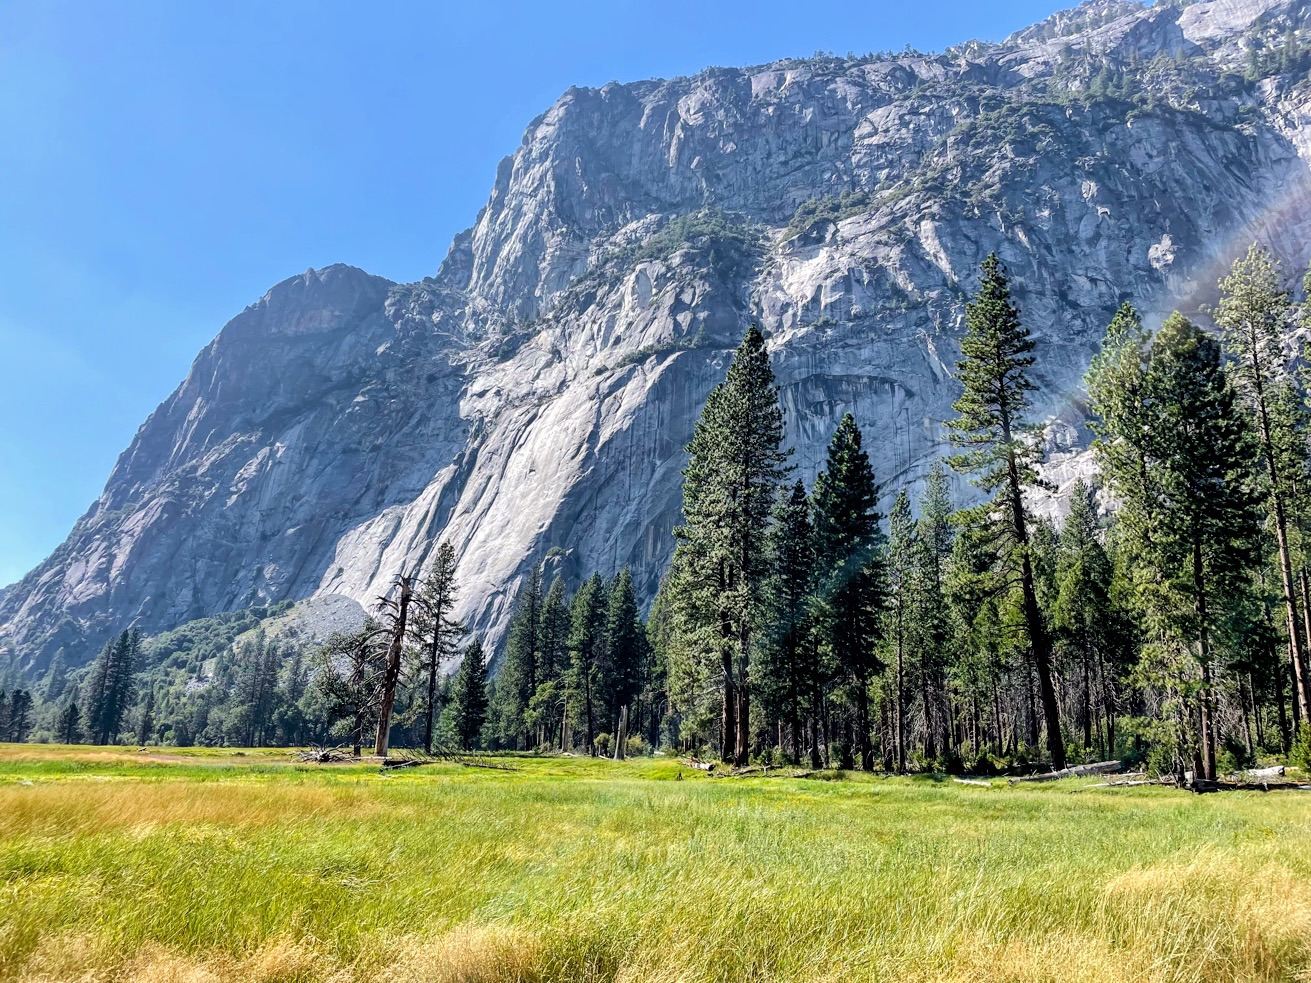
    Yosemite Valley meadows

    This is one of the easiest and most iconic walks in Yosemite.

    Cook’s Meadow sits right in the heart of Yosemite Valley and offers incredible views in every direction.  Park near Yosemite Valley Visitor Center and follow the paved paths through the meadows. 

    This short and easy walk will get you views of the Half Dome, Yosemite Falls, Glacier Point, and Sentinel Rock.

    For maximum views with minimal effort, this is hard to beat. 

    Tuolumne Meadows / Soda Springs and Parsons Lodge

    I’ll be honest upfront – this was probably our least favorite hike.  It’s just not the stunning scenery we’d come to expect of hikes in Yosemite.  Its draw is the naturally carbonated water at Soda Springs.  We were excited to see the water bubbles, but it was underwhelming. 

    Chris at the Soda Springs

    There’s also a historic stone cabin called Parsons Lodge. This lodge was used by early conservationists and scientists as a base for studying Yosemite’s natural environment and educating visitors about wilderness preservation. I”m guessing part of their interest in this spot was because of the unique bubbling water.

    This is another easy hike, about 1.5 miles round trip with minimal elevation gain.  Plan to spend 30-45 minutes there.  To get there, park at the Tuolumne Meadows Visitor Center and follow the flat trail across the meadow.

    A Hike We Didn’t Do (But Want to Next Time): The Pohono Trail

    Since we were already planning a really long and strenuous hike (the Half Dome), we stayed away from hikes that were long and difficult.  That being said, of all the longer hikes we read about, it was the Pohono Trail that caught our attention. 

    Partly because of our stop at the Tunnel View – you could see a trail above that looked quite enticing to me, but in researching I found it was part of the Pohono Trail.

    The Pohono Trail runs along the rim of Yosemite Valley, connecting Tunnel View to Glacier Point. It’s about 13 miles with an elevation gain of roughly 3,700 feet – a definite commitment. You can start at either Tunnel View or Glacier Point. We were so enchanted by Glacier Point Road that the idea of hiking the entire trail and seeing all the viewpoints in one journey sounded exciting. Most people do this as a one-way hike and get someone to pick them up on the other end.

    Which Hikes Are Best?

    Taking the Half Dome and sequoia groves out of consideration, our favorite hikes were definitely Taft Point and May Lake. Both delivered incredible scenery in different ways, and neither required an all-day commitment.

    Up Next

    In the next post, I’ll share the low-effort activities in Yosemite—the places where you can experience the park’s beauty without committing to a full hike. As much as we love hiking, some of the best Yosemite adventures don’t require any gear.

    Enjoyed this post? Subscribe below to get new posts by email!

    Click here to see all posts related to the 4-National Park Road to the Half Dome!

  • Victor’s Pizza | 40 Slices of Pizza: Slice #12

    Chris turned 40 at the end of 2025, and I wanted to do something special without throwing a big party that he wouldn’t appreciate. So I gave him what I knew he’d appreciate the most: 40 slices of pizza!

    Our twelfth stop was: Victor’s Pizza
    545 W 3900 S, Salt Lake City, UT 84123

    Restaurant Vibes

    Chris actually picked this place, which surprised me because he hates driving into Salt Lake City. His major concern is how difficult it can be to find parking. This place does have relatively limited parking options, but we were able to park pretty easily.

    The hostess was super nice, and she offered us a family discount. We paid $50 for cheese garlic bread plus a medium and a large pizza. They offer water bottles for free, which I think is pretty awesome!

    It has a really fun Pulp Fiction theme, though toned down a bit so as to still be “family friendly.” There are a couple of arcade games, and they gave cute stickers to our kids, and they loved it!

    Jules and Vincent pointing bananas 🍌 😂

    They were super fast with the food! And Chris was immediately very impressed. Before giving his official score, he said it was one of the top pizzas in Utah.

    The Pizza

    When trying a new place, I always want to try multiple menu offerings. Victor’s made this easy as they allow you to do half and half despite different sauce bases. I love it when pizza places let you do that!

    Cheese Garlic Bread

    We got half Royale with Cheese and half Pepperoni on one pizza.

    Half Royale with Cheese, Half Pepperoni from Victor’s Pizza

    Our second pizza was half Big Kahuna (ham and pineapple) and half The Wolf (white pie with garlic base).

    Half Big Kahuna, Half The Wolf from Victor’s Pizza

    Our least favorite was The Wolf- the flavor in the ricotta clumps is just too muted. That’s the nature of ricotta I guess, so we know to not got it again.

    The other pizzas, however, were phenomenal. Chris liked everything about it. He said you could tell the pizza was made in a very hot oven.

    I was not quite as impressed as Chris, but when it comes to pizza, his opinion is more “expert” than mine. Though I will say that I loved the crust, which is not true of most pizzas.

    We took home our leftovers and they reheated remarkably well. We decided the flour must be high quality- even the crust reheated in the microwave was still excellent.

    The Score

    Chris rated the pizza a score of 8.3, other than The Wolf slices, which he separately rated a score of 5.7.

    Chris also gives it a status as one of Utah’s top pizzas places.

    Enjoyed this post? Subscribe below to get new posts by email!

    Click here for a complete listing of all 40 pizzas we rated!

  • Which Sequoia Groves in Yosemite Are Worth Visiting? Our Honest Experience at Mariposa and Tuolumne

    There are three giant sequoia groves within Yosemite National Park. During our six-night stay, we were able to visit two of them—though not on the same day.

    Having just come from Sequoia and Kings Canyon National Parks, giant sequoias were no longer a novelty for us. That perspective definitely shaped how we experienced these groves in Yosemite.

    Mariposa Grove

    This grove was the furthest from our campground in El Portal, which made it a bit more of a commitment to visit. From where we stayed, it required roughly a 1-hour drive, depending on traffic.

    At the time of our visit in September 2023, many shuttle services throughout Yosemite were limited, but the shuttle system at Mariposa Grove was running. We parked at the Mariposa Grove Welcome Plaza and caught the shuttle to the trailhead, which made access much easier.

    Because of the distance from our campground, I was surprised to see a mother and her school-age child visiting the grove on a daytrip. I later learned they were from Fresno. Turns out the coming from Fresno, access to the Mariposa Grove is much easier than coming from El Portal.

    One thing that stood out immediately was how dusty the trail was. Compared to the lush forest floors we had seen in Sequoia and Kings Canyon, this grove felt drier and less scenic overall. It ended up not being my favorite sequoia grove, with one exception:

    The Grizzly Giant

    The Grizzly Giant is the 26th largest giant sequoia tree in the world – but it’s first in my heart.

    I just thought it was so fun!  He kinda looks like an angry tree, so it’s easy to see why it’s the Grizzly Giant.  He’s got all these massive arms and it looks like he’s swinging them in a fight – almost like an octopus throwing punches.

    Grizzly Giant

    Standing underneath the tree, I was amazed at the sheer size and weight of those branches.  I’m kind of surprised those enormous tree branches haven’t surrendered to gravity after all this time.

    So basically, since this grove holds what I consider to be the best and most fun sequoia tree, it’s worth coming to see. 

    John Muir meeting with Teddy Roosevelt

    Trail Details

    To reach the most notable trees in Mariposa Grove, you’ll need to opt for the longer loop trail.

    There is a 0.3-mile loop starting at the Mariposa Grove Arrival Area that is mostly flat and wheelchair accessible. However, this short loop only provides a small introduction to the grove.

    To see the more iconic trees, you’ll need to take the 2.1-mile loop. It starts in the same place. It includes roughly 300 feet of elevation gain. It’s worth doing, and if you skip it, you miss out on seeing The Grizzly Giant, along with the California Tunnel Tree, and the Bachelor and Three Graces cluster.

    Tuolumne Grove

    The Tuolumne Grove is located in the Crane Flat area of Yosemite.

    What can I even say about this grove? It was the least memorable for us.

    That doesn’t mean it wasn’t worth visiting—but compared to the other groves we had seen on this trip, it didn’t stand out.

    One important thing to know about this hike is that it starts with a downhill walk, which can feel easy at first. The challenge comes on the return trip, when you have to climb back uphill. The trail is about 2.5 miles roundtrip and includes about 500 feet of elevation gain on the return trip.

    If you’re short on time or energy, this is probably the grove I would skip. But if you’re already in the Crane Flat area, it’s worth a visit.

    Merced Grove

    The Merced Grove is the third giant sequoia grove in Yosemite, and the only one we didn’t get to see.

    At the time of our visit in September 2023, this grove was closed for restoration as part of the Biomass Removal Project. In simple terms, this project involved removing dead trees, fallen branches, and excess vegetation from the forest floor. The goal was to reduce wildfire risk by creating what are called fuel breaks, which help slow or stop the spread of fires.

    Maybe we’ll get a chance to see it next time?

    So Which Sequoia Grove Should You Visit in Yosemite?

    If you only have time for one sequoia grove in Yosemite, choose Mariposa Grove.

    It has the largest collection of trees, the most famous landmarks, and obviously the best feature is the Grizzly Giant, the sequoia with an attitude!

    Under the Grizzly Giant

    Up Next: Yosemite Hiking Trails

    In the next post, I’ll walk through the major hikes we did in Yosemite National Park – other than the Half Dome of course. That’ll get it’s own post. Stay tuned!

    Enjoyed this post? Subscribe below to get new posts by email!

    Click here to see all posts related to the 4-National Park Road to the Half Dome!

  • Tony’s Pizza| 40 Slices of Pizza: Slice #11

    Chris turned 40 at the end of 2025, and I wanted to do something special without throwing a big party that he wouldn’t appreciate. So I gave him what I knew he’d appreciate the most: 40 slices of pizza!

    Our eleventh stop was: Tony’s Pizza
    403 39th St, Ogden, UT 84403

    This place has been around for a long time, and it’s one of the places Chris’s family would go for family dinners. I have never been very impressed, so when Chris wanted to rate their pizza, I was not too enthusiastic but figured we’d get it over with. 

    Tony’s Dinner Meals

    I ordered the Cheese Tortellini, which came with salad and spumoni (Italian ice cream using the colors from Italy’s flag).  The salad is gross- the dressing was just like oil or something. And I did not like the pasta. It was maybe a little overcooked and soft and just not good.

    Tony’s Dinner salad
    Tony’s Cheese Tortellini
    Tony’s Spumoni

    The Pizza

    The garlic cheese bread was pretty good, and so was the pizza, so it’s best to stick with pizza on the menu.  It was a thin crust tavern style, and way better than the pasta!

    Tony’s Garlic Cheese Bread
    Tony’s Tavern-style Cheese pizza
    Tony’s Combo pizza

    The Score

    Chris rated his pizza a 6.8. A pretty solid score. Come for the pizza, not the pasta.

    Enjoyed this post? Subscribe below to get new posts by email!

    Click here for a complete listing of all 40 pizzas we rated!

  • 6 Nights in Yosemite National Park: Where We Stayed, What to Know, and How to Plan Your Visit

    We had already checked three national parks off our list, but this was the one we had been looking forward to the most: Yosemite National Park. After days of driving, hiking, and exploring, we were finally on our way to the destination that had inspired the entire trip.

    And we didn’t just pass through—we stayed here a whopping six nights, making it the longest stop of our adventure. That extra time gave us the opportunity to explore different areas of the park at a more relaxed pace and truly experience what makes Yosemite so special.

    Where We Stayed:

    Indian Flat RV Park | 9988 CA-140, El Portal, CA 95318

    This was probably my favorite campground of the trip.  Our site was close to the showers, which is always nice, but the campsite’s best feature was its proximity to the park.  It’s about a 25-30 minute drive to the heart of Yosemite Valley.

    Where We Ate:

    We mostly ate food we packed ourselves, but we did eat out two nights in the Yosemite area.

    Parkside Pizza | 11120 CA-140, El Portal, CA 95318

    We ordered cheese bread and shared a chicken cordon bleu pizza.  As you probably know by now, we eat a lot of pizza. 

    The cheese bread was our favorite, and it was quite unique.  It looked like it was burnt, but it was actually quite tasty. 

    As for the pizza, the chicken had a funky taste to it, and we liked the pizza much better once we took off the chicken.  We also felt the ranch was too subtle.  The crust was the best part of the pizza; I actually ate the crust off of the leftover slices and tossed the pizza part!

    The Ahwahnee | Ahwahnee Drive, Yosemite Valley, CA 95389

    Dining at the Ahwahnee was quite the experience, and it definitely deserves its own post. I’ll share all the details in a later entry in this series.

    The Major Areas of Yosemite National Park:

    Yosemite is a massive park, and it helps to understand the main areas before you visit. While there are several regions within the park, these are the primary destinations most visitors talk about and explore.

    Yosemite Valley

    This is the heart of the park and what most people come to see.  This is where you’ll find some of Yosemite’s most famous landmarks, including:

    • Bridalveil Falls
    • El Capitan
    • Half Dome
    • Mirror Lake
    • Yosemite Valley Lodge
    • Curry Village
    • The Ahwahnee

    If you only have one day in Yosemite – this is where you’ll spend it.

    Glacier Point

    Glacier Point offers one of the most breathtaking views in the entire park.

    One of the best things about this area is that it’s accessible to visitors of all ability levels. You can drive directly to the viewpoint and enjoy an incredible panoramic view of Half Dome and Yosemite Valley with minimal effort.

    Along the drive, you’ll also find several trailheads offering hikes of varying lengths and difficulty levels.

    * A note about the road: Glacier Point is one of the easiest ways to experience a jaw-dropping Yosemite view—but you can’t always count on being able to drive there. The road is typically closed in winter and occasionally shuts down for construction or snow.

    Wawona

    To reach this area, you drive through the Wawona Tunnel, which is a fun and memorable experience all on its own.

    This route leads you to the Wawona Hotel, a golf course, and Mariposa Grove, home to hundreds of giant sequoia trees.

    Crane Flat

    Crane Flat provides access to the Tuolumne Grove, another grove of giant sequoias. It’s typically less crowded than Mariposa Grove, making it a great option if you want a quieter experience among these massive trees.

    Tuolumne Meadows

    Tuolumne Meadows sits at a much higher elevation than Yosemite Valley, which means cooler temperatures and a completely different landscape.

    This area is known for:

    • Wide open alpine scenery
    • Scenic river views
    • Hiking trails
    • Picnic areas
    • Stargazing opportunities

    It’s especially beautiful in late summer and early fall, when the weather is mild and the crowds are generally smaller than in Yosemite Valley.

    Hetch Hetchy

    This is the one area of the park we didn’t make it to.

    Hetch Hetchy contains a large reservoir created by a dam built in the early 1900s to supply water to San Francisco. The project flooded a valley that many people believed was just as beautiful as Yosemite Valley, which is why the reservoir remains controversial even today. Even though we missed it, many visitors say this area offers excellent hiking and fewer crowds.

    Things to Know:

    Reservations May Be Required

    Entry reservation requirements change from year to year. When we visited in September 2023, reservations were not required, but during some peak seasons—especially summer—you may need a reservation just to drive into the park. Always check the current rules before your trip.

    Traffic and parking fill early

    In Yosemite Valley, parking can be full by 8-9 AM on busy days.  Plan to arrive early or use the free shuttle system.

    Weather varies a lot by elevation

    It can be hot in the valley and snowy at higher elevations on the same day.  Bring layers, even in the summer.

    Limited Cell Service

    Cell service is spotty at best in most areas.  During our stay, we discovered that the area near Yosemite Valley Lodge had the most reliable service. We went there every day to FaceTime with the kids, who were staying with grandparents.

    Up Next: Sequoia Groves

    If you didn’t get your fill of sequoia trees in Sequoia and Kings Canyon National Parks, don’t worry—Yosemite has plenty more to see.

    In the next post, I’ll share which sequoia groves are worth visiting, what surprised us, and how to decide which one fits best into your itinerary.

    Enjoyed this post? Subscribe below to get new posts by email!

    Click here to see all posts related to the 4-National Park Road to the Half Dome!